Instead of using a patched Nerd Font to display symbols in your terminal, you can download the Nerd Font symbols only, then alter your terminal to use that symbols font for characters in the symbol range.
This lets you use your favourite unpatched font for regular characters. It’s great for newish fonts that haven’t yet been mangled horribly nerdfontified, such as Intel One Mono. Or if you like using fonts undoctored so that type designers can sleep at night.
1. Download “NerdFontSymbolsOnly.zip”
You’ll find this in the latest Nerd Font releases page. Click ”show all x assets” if you don’t see the SymbolsOnly zip file at first.
Unzip and install SymbolsNerdFontMono-Regular.ttf. Be sure to choose the mono version. Terminals such as Kitty expect monospaced fonts only.
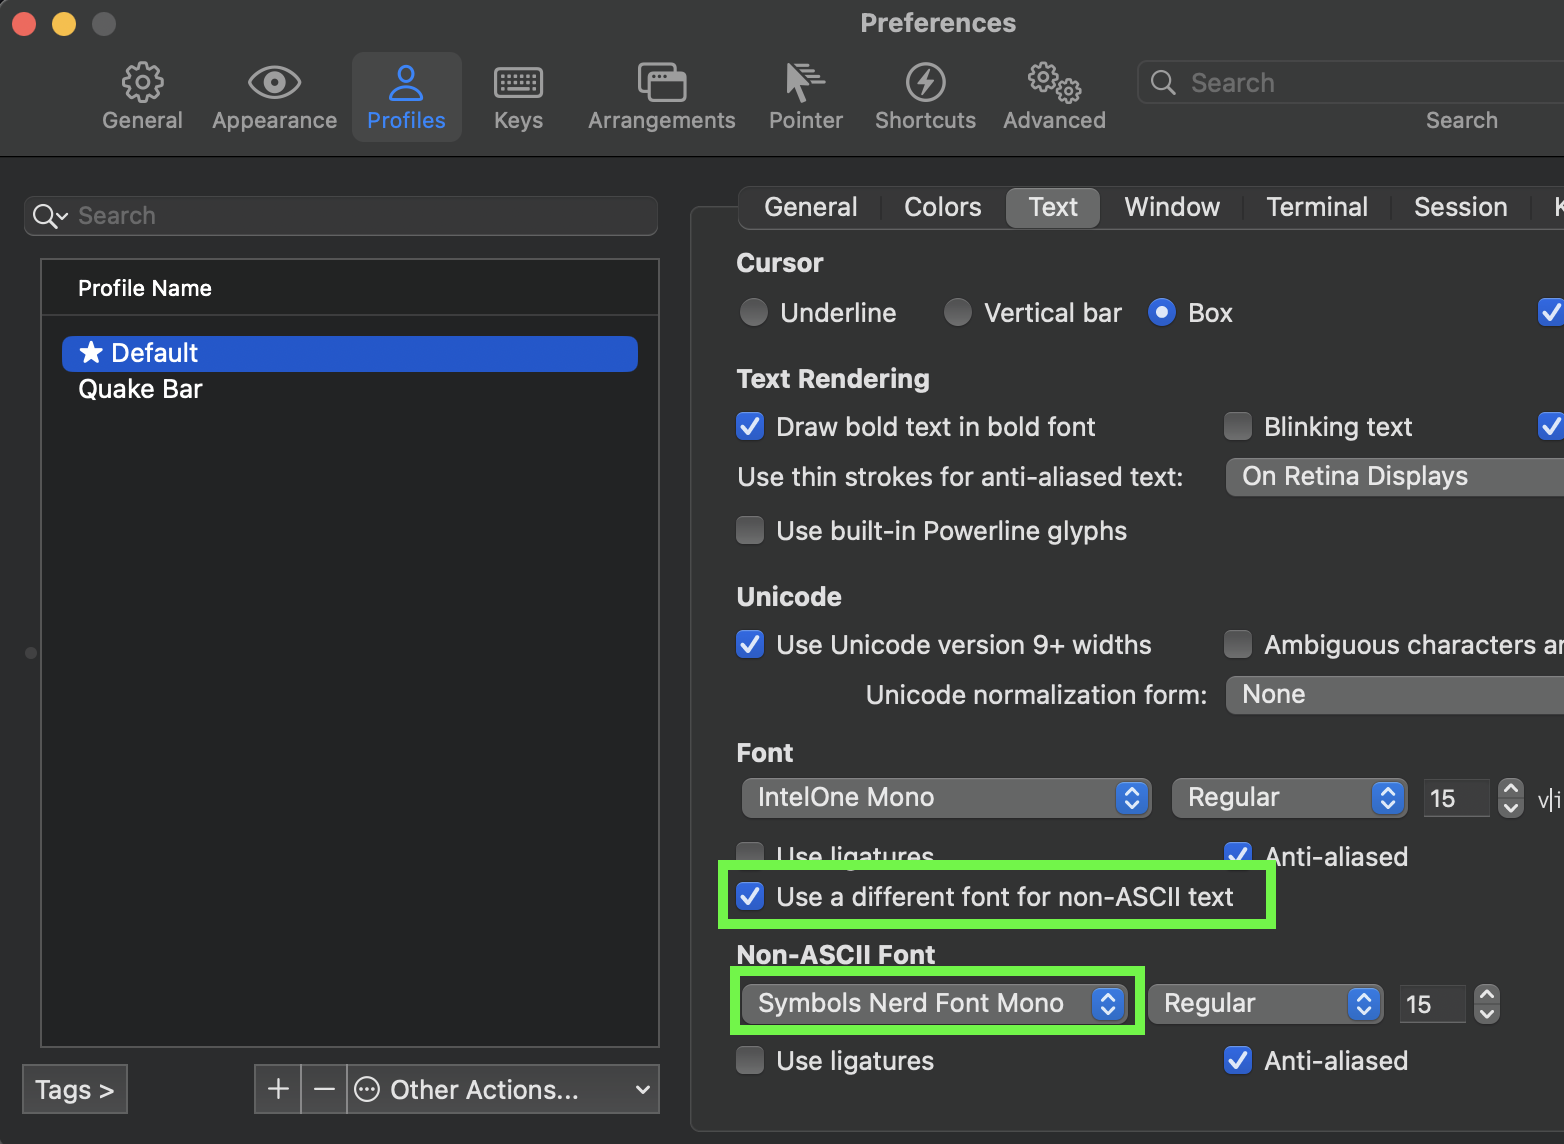
2. If using iTerm
For each profile you have in iTerm at Preferences → Profiles, edit the Text tab settings to:
- Tick “use a different font for non-ASCII text”.
- Choose “Symbols Nerd Font Mono” for the non-ASCII font, being sure to set the font size to match your default.
3. If using Kitty
Kitty is even better than iTerm in that it lets you override specific character ranges instead of just “everything that isn’t ASCII”. See the note in Kitty’s documentation about the symbol_map directive.
I use this in my kitty.conf:
# Use Nerd Font symbols without patching fonts.
# See https://sw.kovidgoyal.net/kitty/faq/#kitty-is-not-able-to-use-my-favorite-font.
# Requires Symbols Nerd Font Mono from NerdFontsSymbolsOnly.zip at https://github.com/ryanoasis/nerd-fonts/releases.
# Check https://github.com/ryanoasis/nerd-fonts/wiki/Glyph-Sets-and-Code-Points to adjust ranges if this does not work.
symbol_map U+23FB-U+23FE,U+2665,U+26A1,U+2B58,U+E000-U+E00A,U+E0A0-U+E0A3,U+E0B0-U+E0D4,U+E200-U+E2A9,U+E300-U+E3E3,U+E5FA-U+E6AA,U+E700-U+E7C5,U+EA60-U+EBEB,U+F000-U+F2E0,U+F300-U+F32F,U+F400-U+F4A9,U+F500-U+F8FF,U+F0001-U+F1AF0 Symbols Nerd Font Mono
4. In VS Code
After installing it as above, set ‘Symbols Nerd Font Mono’ as your fallback font in your ‘Terminal > Integrated: Font Family’ setting. For example:
{
    "terminal.integrated.fontFamily": "'Intel One Mono', 'Symbols Nerd Font Mono'"
}
Or via the UI:

Then, any characters not available in your main font will be displayed with the symbols font.
5. To test symbols
After restarting your terminal application, try copying and pasting a few of these symbols:
Branch: Tag: Diff Added: Diff Removed: You should see icons instead of boxes or question marks, like this:

Alternatively, read the test-fonts shell script, then try piping it into whatever shell you’re using and check for symbols:
curl https://raw.githubusercontent.com/ryanoasis/nerd-fonts/master/bin/scripts/test-fonts.sh | zsh